Saturday, 26 July 2014

How to Make Woven Rice Casing from Coconut Leafs (ketupat "bahasa Indonesia)

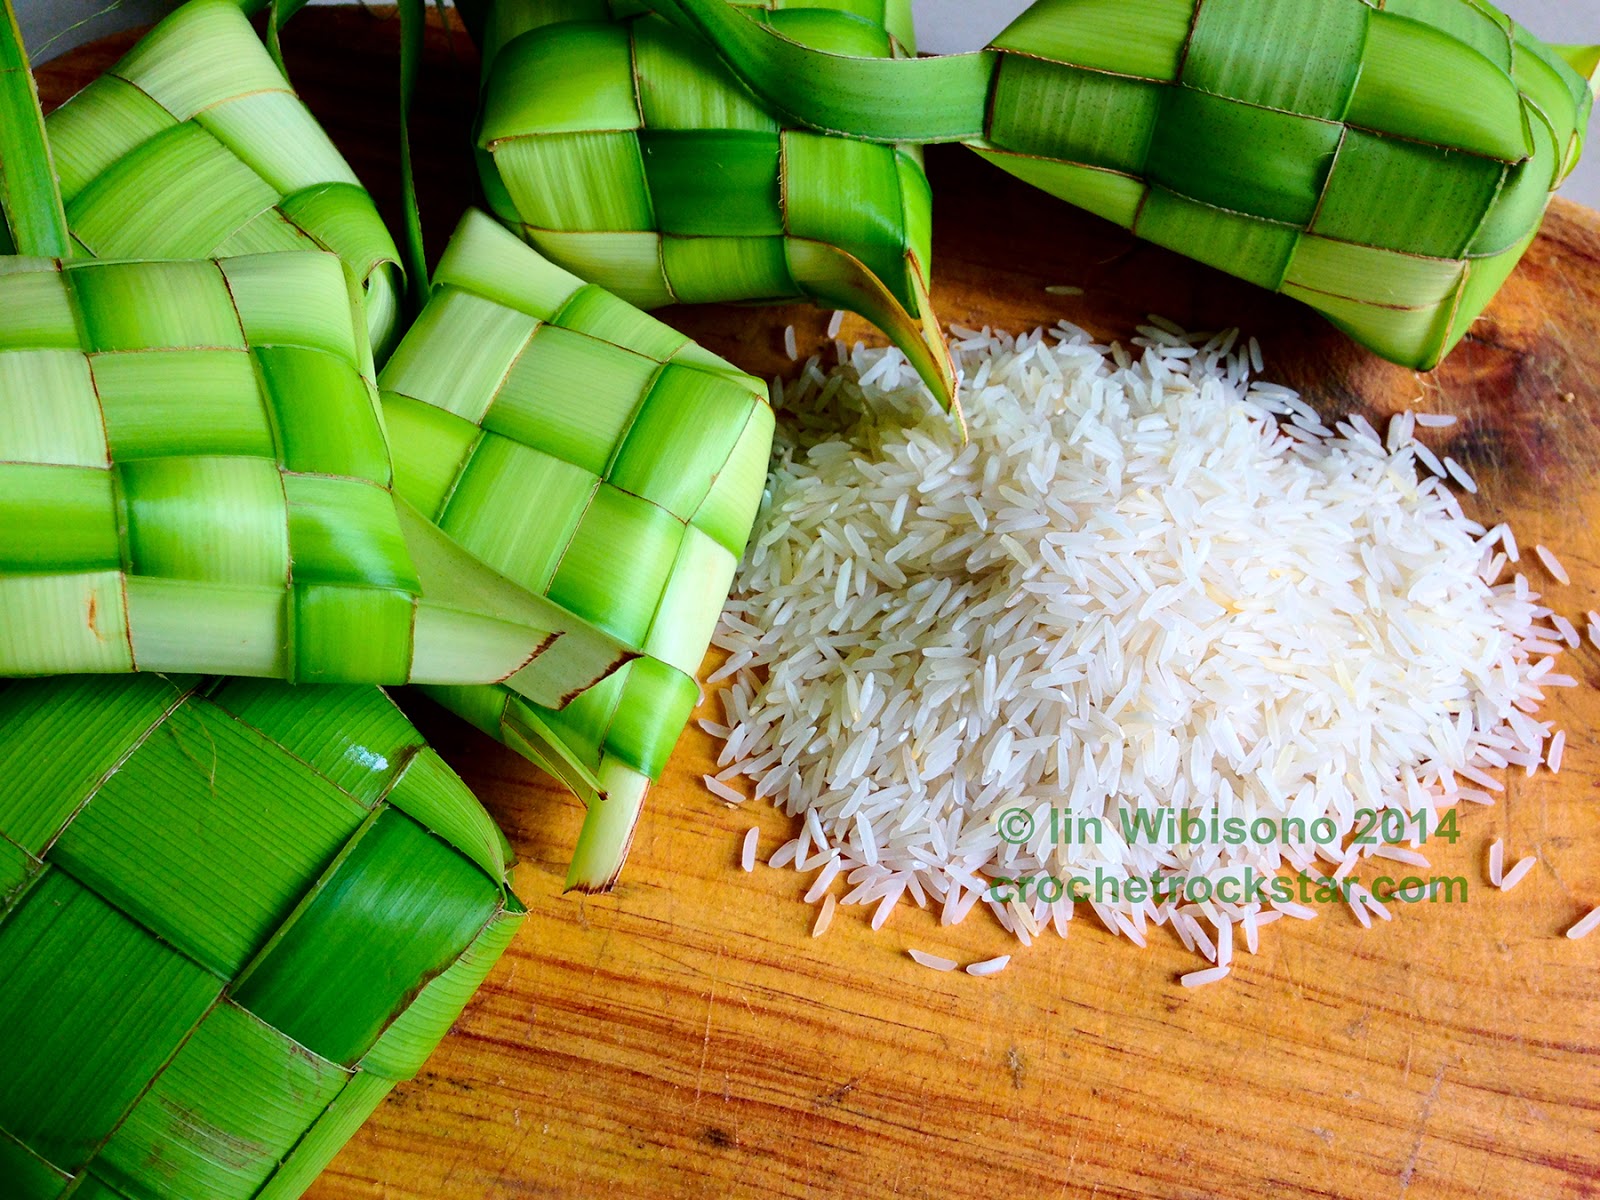
Hello, it is almost Eid El Fitr and everyone in Indonesia and Malaysia are busy making the feast. One of the famous meal is ketupat. Ketupat is made of woven rice sack from coconut leafs. Most of tropical countries has coconut trees, choose the young leafs to make the ketupat.

For the filling you can use any type of rice from Thai to Basmati. Wash the rice and fill up 1/2 of the pocket then boil in a large pot with plenty of water for about 2-3 hours.  You could also use a presto cooker for a faster result for 30 minutes. Once the pocket is hard and fully expanded, it is done. Tie all the pockets together and hang them in a well ventilated air. Cut the ketupat in half diagonally, remove from pocket, cut into small cubes, eat with vegetable or chicken curry and kerupuk (prawn crackers).

Most of the people I met know how to make this, but new generation probably don't. I have shoot this video for those who wanted to learn how to make it. Pardon my English, no time to edit as I was busy cooking hehe...


Here is the tutorial video on how to make it.


This is how the ketupat look like after 3 hours of boiling and drained. Add more water during cooking to make sure the cases submerge in the water.


Cut the ketupat in cubes and eat with shredded young papaya in coconut milk or chicken curry, rendang, and  or dendeng (salty beef jerky), garnish with friend shallots.  Add sambal (chili paste) spicier gravy.

If you like what you see and made something from my free pattern, all I ask is that you credit me by mentioning my name and my blog and provide the link to my blog. Please DO NOT re upload my files by any means to another blog or website. All my photographs are copyrighted. Thank you.

Friday, 25 July 2014

Message Video from Prabowo Subianto | 25 Juli 2014


If you see this video it's not a mistake. I posted it in my blog because what is happening in my country right now will dictate our life in the future for the next few years or till my grandchildren are born if all of us silence toward hypocrisy in our government for letting the one who cheats in the election won.

How would you do your business and how would you live your life if your leader cheats on you, what would be the outcome of it for the rest of the thing that leader would do to you if his character is based on lies? If someone lies on the first place, he will have to make more lies to cover the previous lies. As a citizen, I have the right to raise my voice and that is why I am posting the video of Mr. Subianto here, not because of who he is, but because of what he stands for: FREEDOM AND JUSTICE FOR ALL!

By the time I posted this Mr. Subianto and his team have gathered all of the evidence and taking it to the Court.

TRUTH WILL PREVAIL!

Nasty, illogical comments and claim without proof of evidence will be removed.

Saturday, 19 July 2014

Crochet Strawberries

I promised some friends in FB group that I will post the instructions for this strawberry crochet fruit. This fruit pattern is part of the pattern I wrote for the strawberry crochet bag available in Ravelry. 
Below are the step by step pictures. Hope my instructions are clear enough and help those who is making this for the first time. I have used yarns of different thickness in making the fruits using the same pattern and the result are different sizes.

Pattern
The crocheted fruit begins in center down, and spirals outward and up. There is no increase in the
number of stitches after round 6 when the stitches reach 30 sc. Place marker on the last stitch of each round.

Materials: Yarn size 3 in red and green and small amount of size 2 cream or light yellow. Small amount of toy stuffing. Hook C/2.75 and a yarn needle.


Using red, ch 2
Round 1: 5 sc into 1st ch—5 sc


Round 2: 2 sc into each of 5 sc—10 sc
Round 3: (2 sc into next st, 1 sc into next st) repeat around —15 sc
Round 4: (2 sc into next st, 1 sc into each of next 2 st) repeat around —20 sc
Round 5: (2 sc into next st, 1 sc into each of next 3 st) repeat around —25 sc


Round 6: (2 sc into next st, 1 sc into each of next 4 st) repeat around—30 sc
Round 7: 1 sc into each of next 4 st—30 sc
Round 8: 1 sc into each of next 4 st—30 sc
Round 9: 1 sc into each of next 4 st—30 sc


Round 10: (sc2tog, sc in next st) repeat around—20 sc


Thread a yarn needle with cream, stitch around the fruit from the inside out starting from the bottom
skipping one round alternatively. 


Dump the remaining threads inside then insert the stuffing. Place any
left over yarn on top layer of the toy stuffing to prevent the needle pulling out any hair. Thanks Lola Pool  of Lagos Crochet Group for this idea of dumping the thread inside.


Round 11:Round 11: sc2tog front loop only all the way around—10 sc

Round 12: sc2tog front loop only all the way around—5 sc
Stitch around to tighten. Cut yarn.

The leafs
Ch 2, 6 sc into the first ch, join with sl st.
*Ch 4, slip stitch into 2nd ch from hook, sc into each of next 2 st, sc into next sc) repeat from * 6
times. Cut the yarn leaving 20 cm tails. Sew the leaf into the strawberry.  


Cut the yarn leaving 20 cm tails. Sew the leaf into the strawberry.


If you like what you see and made something from my free pattern, all I ask is that you credit me by mentioning my name and my blog and provide the link to my blog. Please DO NOT re upload my files by any means to another blog or website. All my photographs are copyrighted. Thank you.

Saturday, 5 July 2014

I choose No. 1


Salam, hello, hope you like my No. 1 crochet number. This is how I show my support for Indonesian president candidate no. 1, Prabowo Subianto. Today I  fulfilled my right in the election in Lagos.

If you like what you see and made something from my free pattern, all I ask is that you credit me by mentioning my name and my blog and provide the link to my blog. Please DO NOT re upload my files by any means to another blog or website. All my photographs are copyrighted. Thank you.

Sunday, 29 June 2014

Bag Base Board - DIY

A bag base board is a piece of stiff material which is cut to the shape of your bag's base to avoid it looking shaggy. It also makes the bag easier to organize. There are several types of them from permanent to removable boards, and from economical to more pricy boards. Some boards are made to fit the size of the leading brands. They are available online and some online stores even offer custom cut acrylic boards to your requirements.

The one I am showing you is the removable version and you can make it from the materials you might already have at home. The board I am using is an old plastic cover from my kids' school notebook.
To make one just follow the step by step pictures below. Some types of glue require you to work in a well ventilated area so read the instructions carefully before working.

You need a piece of white copy paper or tracing paper and the items shown in this picture: a piece of fabric, acrylic or sturdy plastic, scissors, measuring tape, glue, and a pen.


Pictured on the left is before inserting the base board, and the right picture is with the board inserted.


If you like what you see and made something from my free pattern, all I ask is that you credit me by mentioning my name, my blog and providing the link to it. Please DO NOT re-upload my files by any means to another blog or website. All my photographs are copyrighted. Thank you.

Wednesday, 28 May 2014

Frilly Pansy Crohet Flower


Zelna Olivier's Jar Jacket beautifully embelished with a pansy crochet flower.


Pictures and crcheted pansy above from left to right by Zelna Olivier, Kalpana Chitharanjan and Oona Linet. Photograph credits by respective artists.

Here is a quick decorative idea for you. Make many of these pansy flowers and use it as crochet applique or incorporate it into crohcet fabric for decorative tea cozy, or attached into a pin and give it someone to brighten up her day.  

 Special thanks to Zelna Olivier at http://zootyowlcards.blogspot.com, Oona Linet, and Kalpana Chitharanjan who kindly tested this pattern. Without their positive feedback it is impossible for me to come up with a clean, easy to follow pattern instruction you are now reading.  

Terms:  US
Difficulty Level: Easy
Yarn:  Size 2 Sport/Fine yarns in 4 colors. Yarn needle and a tapestry scissorHook: C/2.75 mm
Gauge: 1 flower is 3 inches in diameter from longest points.


Finished Measurements: 3 inches in diameter from the longest points. 

Note:
Stitches Used:Chain – chSingle Crochet – scDouble Crochet – dc TTreble – trDouble treble – dtr
Note:Standing sc – make a slip knot, insert hook into next st, yarn over, pull through two loops. Reverse sc – working on the right side of the fabric, insert hook into the next stitch to the right, yarn over (two twisted loops on hook), pull through 2 loops.

Joining stitch using yarn needle: On the last stitch, elongate the loop and then cut the yarn leaving 6 inches tail. Thread yarn using a yarn needle, insert the needle under the two loops of the 1st st. Gently pull the thread and insert it into the space between two loops on the surface of the previous stitch (see picture). Sew the tail in. 

Pattern

R1: Using yarn A, ch 2, 5sc into 1st ch leaving 2 loops on hook on the last sc.


R2: Insert hook into the two loops on the first sc, pick up B and pull yarn through all 4 loops, ch 1. (sc, dc, sc) into the same st, *(sc, dc, sc) into the next st; repeat from * 4 times—5 (sc, dc, sc) group,  join to the 1st sc using yarn needle, see Note. Cut off A and B—5 small petals.


R3: Pick up C. Insert hook into any sc of round 2, ch 5, 2 dtr into same st, 3 dtr into next st, 3 dtr into next st, 2 dtr into next st, ch 5, sl st into the same st —1st petal made.


You will start the new petal at the end of the old petal… thus immediately ch 5, 2 dtr into the same st, 3 dtr into next st, 3 dtr into next st, 2 dtr into next st, ch 5, sl st into the same st —2nd petal made.

Ch 3, dc into the same st, 1 tr into the same st, 3 tr into next st, 3 tr into next st, 1 tr into next st, 1 dc into same st, ch 3, sl st into the same st —3rd petal.

Ch 5, 2 dtr into same st, 3 dtr into next st, 3 dtr into next st, 2 dtr into next st, ch 5, sl st into same st—4th petal.

Ch 3, dc into the same st, 1 tr into the same st, 3 tr into next st, 3 tr into next st, 1 tr into next st, 1 dc into same st, ch 3, sl st into the same st, cut off yarn C—5th petal.

R4: Using D, make a slip knot, insert hook in any stitch between two petals and make a standing sc. Reverse sc as follows: 3 reverse sc into the ch-5 sp, reverse sc into each st around the edge of the petals, reverse sc into the space in between two petals. Cut off yarn, sew in all ends to finish.

PDF available on Ravelry.


oooOooo


PS: If you like what you see and make something from my free pattern, all I ask is that you credit me by mentioning my name and my blog and provide the link to my blog. Please DO NOT re upload my files to another blog or website. All my photographs are copyrighted. Thank you.